Australia Tourist Visa Guide for Filipinos: How I Got Approved in 6 Steps
Of all my visa applications, I can say that applying for an Australia tourist visa or visitor visa, was the easiest for me, simply because it can all be done online. Plus, an Income Tax Return (ITR) is not a requirement. Isn’t it great? This makes it easier for self-employed freelancers who still don’t have this document.
|
Tip: Secure your Australia eSIM before your trip. You’ll have peace of mind knowing you’ll have data connection even before your arrival. You don’t need to insert a physical SIM — just download the app and install your eSIM on your phone. Pretty convenient, right? |
Just to share, one of my travel buddies got denied on his first attempt to apply for an Australia visitor visa. But the good thing about the Australian visa is that you can re-apply as soon as you get denied. I’ll share with you the tips on how my friend got approved on his second application.
Meanwhile, make sure you follow these steps carefully:
Australia tourist visa for Filipinos online steps
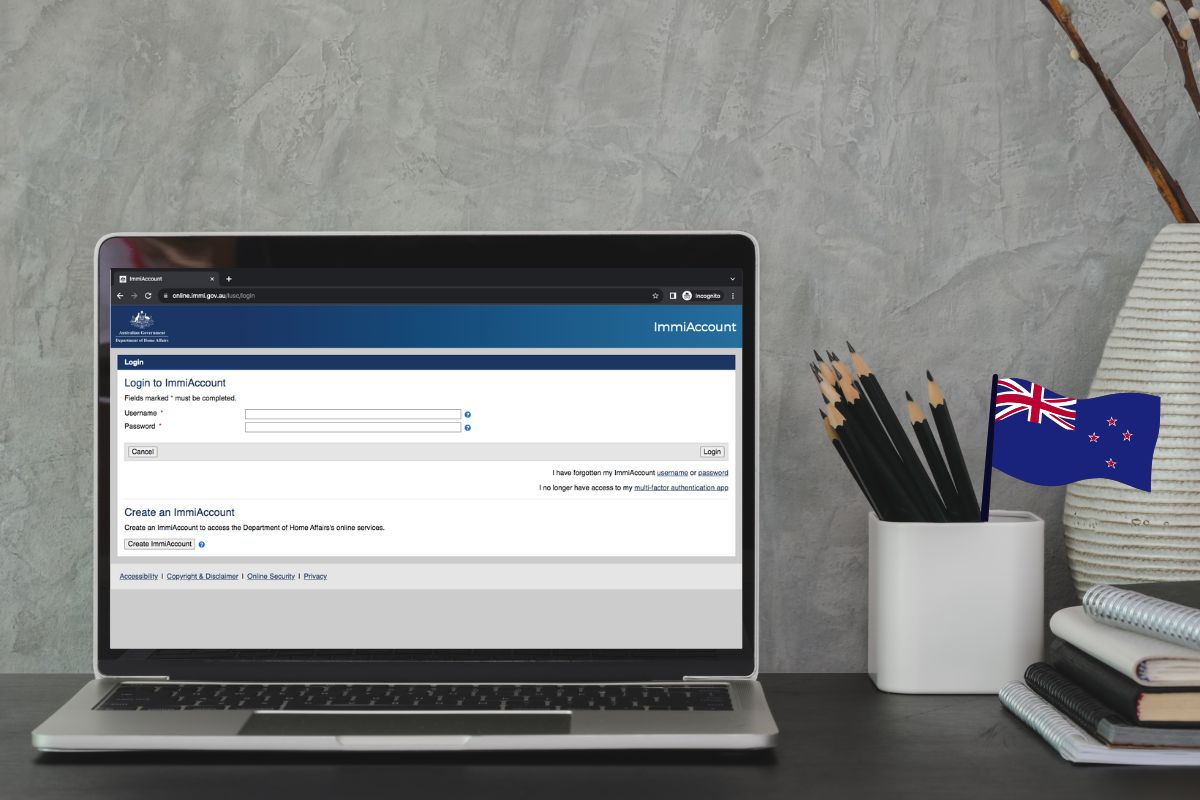
Step 1: Make your Immigration Australia ImmiAccount
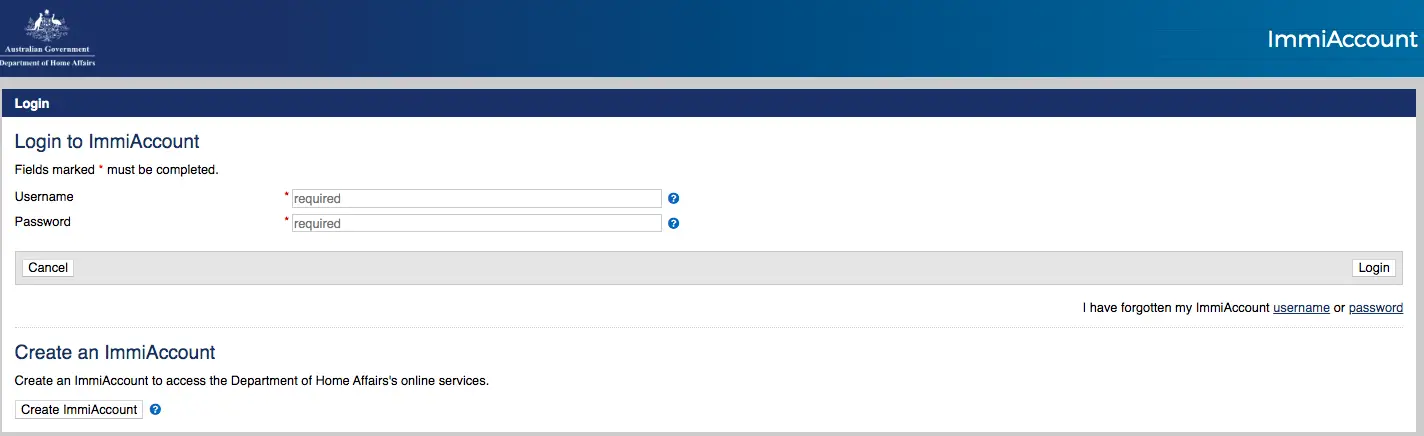
Go to the ImmiAccount portal and click “Create ImmiAccount”. Write your new user details such as complete name, contact numbers, and email address. Then, you indicate your username, password, and secret questions.

To continue, you have to agree to their terms and conditions. Once you submit, an email verification will be sent to you.
Tip: Make sure that your email is valid and active. All notices, updates, and your final Australia visitor visa will be sent there.
Step 2: Log in to create your Australia visitor visa application
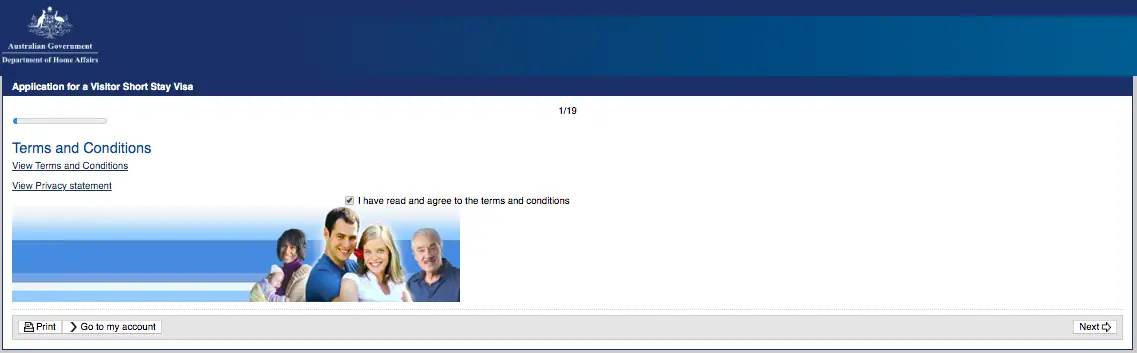
Once your email is verified, log in to your ImmiAccount and create your Australian tourist visa application. Select Visitor Visa (600) if you’re traveling to Australia as a tourist for not more than one year.
You will have to fill in and answer about 20 pages, but you don’t have to answer them all at once. Answer any that you can. Click “Next” if you want to proceed to the next page, and “Save” if you want to take a break first and complete it later.
Tip: It took me about three days to finish all the pages, so take your time. Double-check or triple-check all details before you finally click “Submit”. Any errors or data inconsistencies may compromise your Australian visa application.
Step 3: Scan and attach your Australia tourist visa requirements
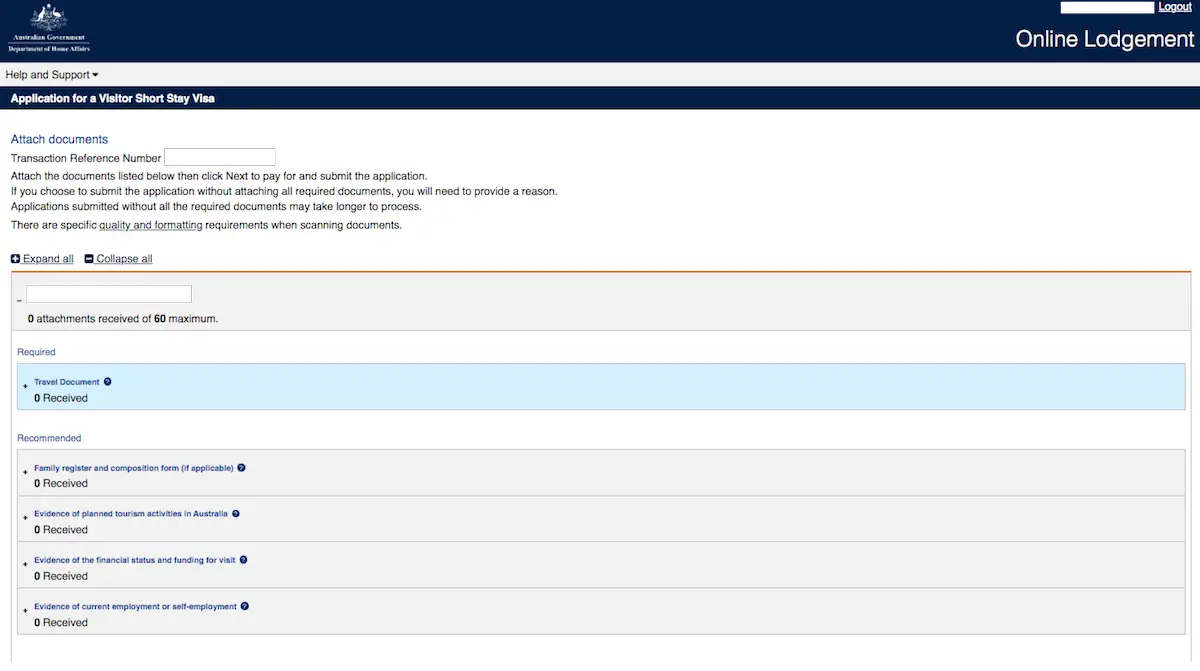
On the last part of your application, you will have to attach your Australia visa requirements proving your identity and travel capacity. You can submit and attach up to 60 documents. Here’s how to attach documents in your ImmiAccount.
Here’s a list of what I submitted and attached for my Australia visitor visa:
- Passport Bio Page
- PSA Birth Certificate
- Old Visas and Entry/Exit Stamps
- Employment Certificate with Approved Leaves
- Bank Statement and Bank Certificate
- Daily Itinerary and Flight Tickets
*Since the implementation of the biometrics collection, you no longer have to attach passport size photos on your Australia visa online application.
List of attached documents for Australia visitor visa (short stay)
Required documents:
- Travel Document (Passport Bio Page, Other Passport Pages with Personal Info, Other Travel Docs)
Recommended documents:
- Family register and composition form (if applicable)
- Evidence of planned tourism activities in Australia (Itinerary, Planned Activities, etc.)
- Evidence of the financial status and funding (Bank Statement, Payslip, Title Deed, Tax Document, etc.)
- Evidence of current employment or self-employment (Employment Certificate, Leave Notice, Business Registration, etc.)
Step 4: Pay the Australian tourist visa application fee
Submit all your documents and pay the Australia visa application fee. You can pay using debit/credit card, PayPal, UnionPay, and BPAY. See process of Australian visa online payment.
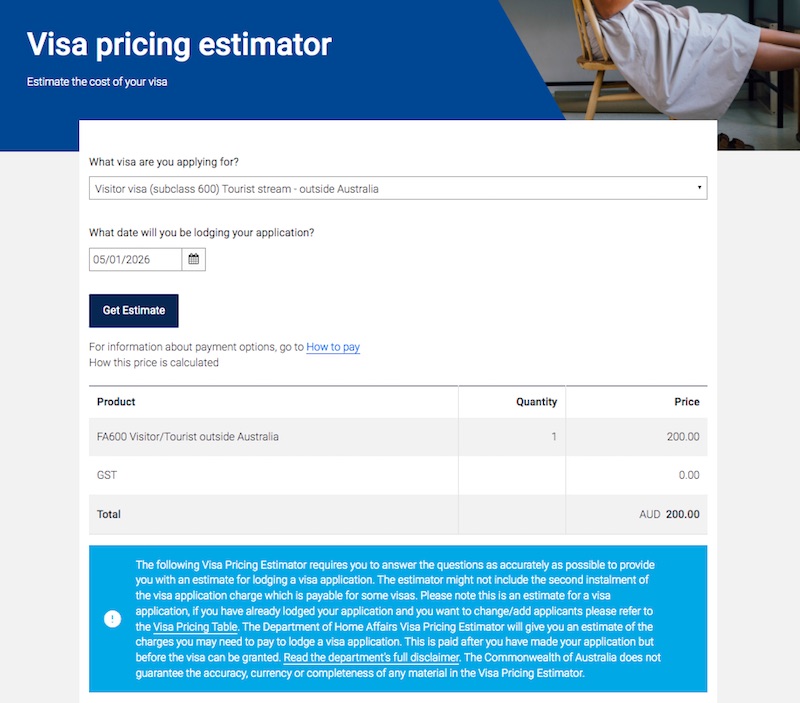
How much is the Australia visitor visa fee?
As of writing, the visa application fee for Australia visitor visa (subclass 600) is AU$200 (₱7,800). Additional credit card processing fees may apply. You may check the Australia visa fees estimator for the latest fees.
Once you pay, you will then get an acknowledgement email that your Australian tourist visa application has been received.
Step 5: Schedule your biometrics collection at VFS Global
After submitting your Australia tourist visa application, you will receive an email containing the biometric requirement letter from the Australian Government Department of Home Affairs.
You will then need to book an appointment at VFS Global in Manila or Cebu to have your biometrics data collected. Take a copy of that email along with your Philippine passport on your scheduled appointment date.
Do note that the VFS biometrics collection fee is ₱615. You may read the breakdown of fees and biometrics collection guide by VFS Global to know more.
Step 6: Keep calm and wait for your Australia tourist visa
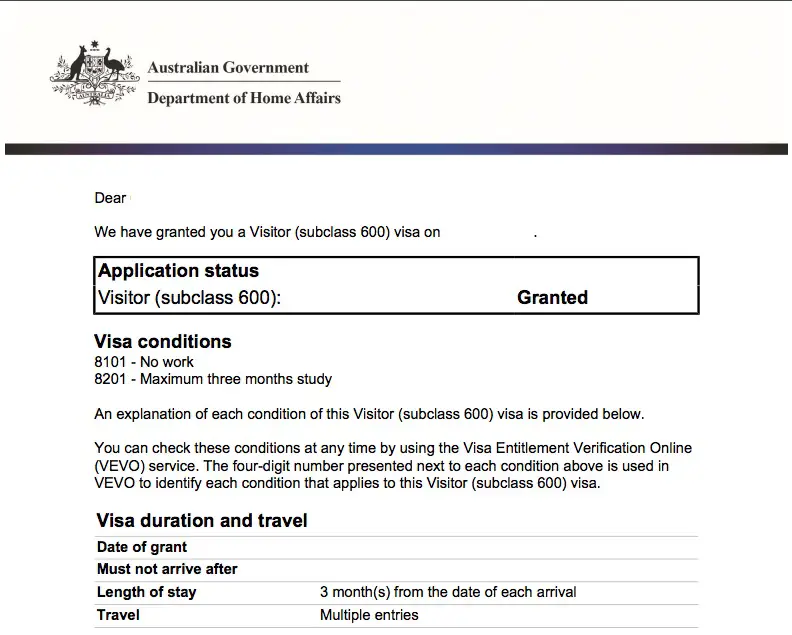
The Australian visa processing time could vary from 48 hours to 26 working days. Fortunately, I got my multiple-entry Visitor Visa (subclass 600) after five working days. That quick!
Tip: You may check the Australian visa processing times online, which is updated every month, so you’ll have an idea on how long your visa application may be processed.
Australian visitor visa cost breakdown
- Australia visa application fee = AU$200 (₱7,800) + 1.40% (₱99) credit card fee
- Biometrics collection fee = ₱615
- Bank certificate / statements = ₱300
Estimated Total = ₱8,814
More of less, you will have to prepare around ₱9,000 to ₱10,000 for your Australia visitor visa application.
Australia visitor visa application tips to increase chances of approval
As what I’ve said, my friend was denied on his first Australian tourist visa application, but he applied right after adding more supporting documents. If you get denied, re-evaluate your application, correct any error, add more proofs of travel capacity, and re-apply as soon as you can! There is no holding time for Australia visa re-application. You may also check our tips to increase chances of visa approval.
Tip #1: Submit certified true copies of documents
If your documents look dubious, I recommend that you submit certified true copies of these documents before scanning and submitting them online. My friend submitted a not-so-professional-looking payslip. We think it was a major factor for his visa denial.
Tip #2: Attach supporting documents
Flight tickets and hotel reservations are NOT required, but they could show proof that you are capable of paying for your travels and that you will return to your home country because you already booked a return ticket. My friend didn’t attach these documents on his first application.
Tip #3: Scan the printed copies of your bank statements
Downloaded copies of your online bank statements do not count as official bank statements. My friend did this in his attempt to save money. Do not scrimp on your official documents. You have to request an official bank certificate and bank statements from your bank, scan, and attach them to your online visa application.
Tip #4: Show proof of travel history
You may attach old visas, eVisas, and passport stamps on your old and new passport.
Tip #5: Create a cover letter
A cover letter is not required for Australia visa, but it doesn’t hurt to submit one, especially if your situation needs to be explained. My friend submitted a cover letter on his re-application, and it worked!
Tip #6: When traveling as a group, input your group name
If you are traveling with someone or with a group, you could indicate this in Step 2. You can assign a group name with a list of members. Tell your travel buddies to input the same group name when they apply for their own visas individually. With this, the Australian embassy can tell who you’re traveling with, and crosscheck all your information.
Hope you find this Australian visa guide for Filipinos helpful. Best of luck in your Australia tourist visa application!
Ready to start your Australian adventure? You may want to read our Taronga Zoo guide if you want to see some cute animals in Australia.
See our other visa guides as well:
Disclaimer: I don’t claim to be a visa expert here. Although I was granted a multiple-entry Australia visitor visa, I still recommend that you visit the Australian Embassy in the Philippines and the Australian Government Department of Home Affairs for your questions and concerns. This visa guide was originally published in Jan 2019 but has since been updated for freshness and accuracy of information.